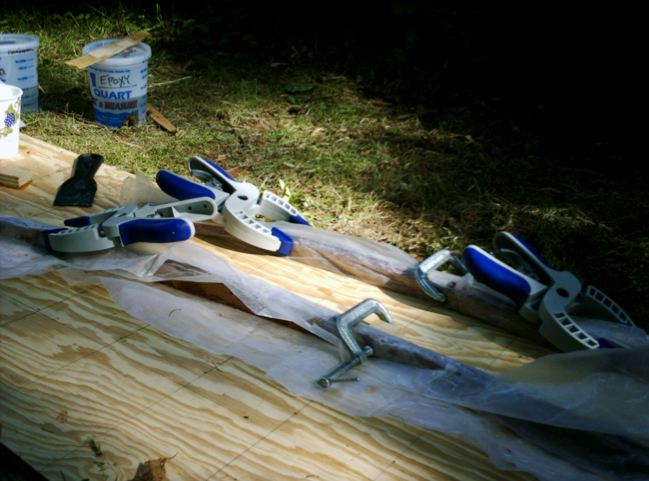
Spent a couple of hours this afternoon figuring out how to best clamp the strips onto the beam bending jig, cutting a few more cleats and then epoxying everything in sight. Most of the side bin cleats are now attached to the bulkheads, the cleats for the vent truck are in place, and two deck beams are currently curing. Nice to have a mostly powertool-free day. It let me attempt to absorb bluegrass banjo by osmosis from Bad Livers concert recordings, thanks to the Internet Archive.
While all this epoxy is curing, I'm going out to kayak in the lake. The weather this week has been just fantastic (see for yourself!)
15 June 2006, Day 6
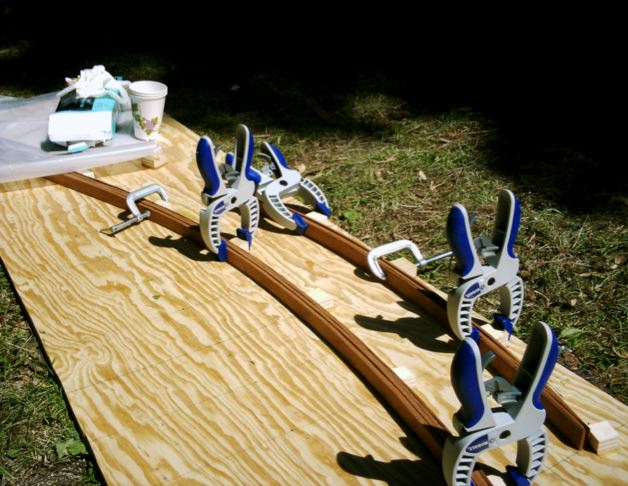
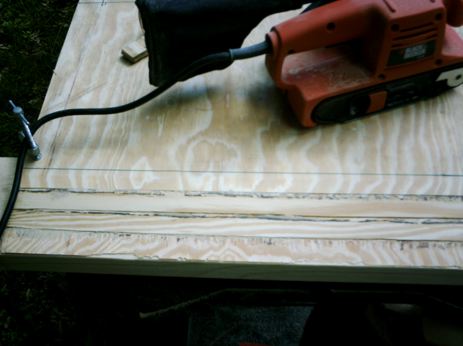
Bending jig curing
Relatively little work done today. I'm giving a talk at a conference on category theory ("generalized abstract nonsense") in Nova Scotia at the end of June, so I spent the morning working on material. I'll hopefully be bringing my Sea Glider folding kayak, so I finally got around to ordering everything I need to make a breakdown paddle, spray skirt and sea sock. The paddle is a Greenland stick make out of a cedar 2x4 with a ferrule from Chesapeake Light Craft. I made my last paddle entirely with hand tools, but this one is getting the power saw / belt sander treatment.
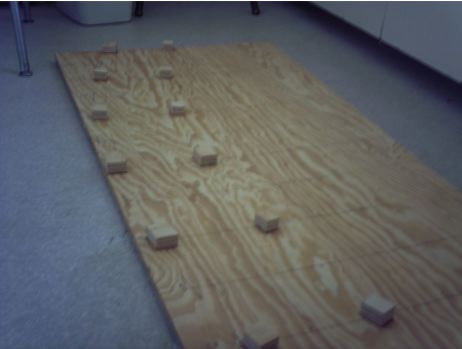
As for the Paradox, I ripped more mahogany strips for the deck beams and also some cleats for the side bins. I also made the jig for bending the beams. It consists of plywood blocks epoxied to a scrap of plywood which the strips will be clamped to while they cure. I made the jig so that it can bend two beams at once. I'd like to have them done by the time I leave for Nova Scotia.
I said the jig was on scrap plywood -- not quite true. It is actually on the rudder blade's board, so when the beams are bent I'll be chiseling the blocks off and sanding it back down to plywood. Hope this doesn't turn out to be more hassle than it is worth...
Derek Clark has a nice article over at Duckworks Magazine on building his Paradox Enuf.
13 June 2006, Day 5
The magic of chemistry
To get some practice with the epoxy, I made a putty out of the epoxy and wood flour to fill in some of the dips in the more poorly-done scarph cuts. It looks like everything is curing as it should --- this stuff is like magic! I cut the last scarph for a side panel, puttied a bunch of knotholes on one of the poorer sheets of plywood. I'm not sure where to put the side panels while gluing yet, so time to move on to other parts. Used up some sawdust today making epoxy putty. The putty was to fill in some low points made by the circular saw cuts and some knotholes in the outer veneer of one of the plywood sheets.
I finished up by cutting the ``forward stateroom door'' out of bulkhead #2, mixing up some fumed silica / epoxy glue and joining the two halves together. Not too eventful, but now I feel much more comfortable with mixing and using epoxy.
12 June 2006, Day 4
Today was all about bevels. I got the chine logs cut and sanded, then started trying to cut the scarphs for the side panels. I was tempted to do fiberglassed butt joints on the sides, but Matt's comment from his Enigma build log convinced me otherwise:
After doing these taped butt joints that everybody says are real easy, I confirm my personal belief that glued scarfs are faster, easier, cheaper and bend fairer.
Rough-cut plywood scarph
Cleaning up with the belt sander
I tried to do the first plywood scarph with my circular saw and a not-very-well-made jig, but this predictably did not come out so well. A few passes with the belt sander made a big improvement, though. In the end, I settled on this method for making the scarphs: marking the scarph line on the side of the panels, then using the circular saw to cut three depth lines, one down to each glue line between plys. I chiseled off the ply layers to get a sort of staircase, which then got belt sanded down to a nice slope. This ended up being pretty easy, if time-consuming. I cut three of the scarphs and then called it a day, finishing up with a great dinner at Maxie's Supper Club. The epoxy also arrived today and I picked up a bunch of putty knives, containers, gloves, and other goodies.
11 June 2006, Day 3
Chameleon offering moral support
I started the day off by drawing and cutting bulkhead #3, so all frames are now cut out. Next, I spent some quality time with my new circular saw. I have a large chunk of mahogany left over from a project several years ago, so I began by trying to rip strips for the deck beams. I should qualify that: trying to rip strips freehand, as I couldn't get a rip guide when I bought the saw. I now realize that it wouldn't have helped much, since the strips are far to thin (only a couple of millimeters thick). The first strip came out too thick by a lot, but gave me a chance to even out the edge of the rough-cut mahogany board. The next one came out just right. I cut the strip without a jig, which was no problem as long as I went slowly. I think this would have been impossible were it not for the laser cutting guide on the saw. This first big strip was cut into six smaller ones, to be laminated into the deck beam for bulkhead #1. I also began to build the bending jig for the beams. Next on the agenda: ripping cleats, chine logs, shear clamps, and about a million other bits and pieces from the lumber, and making a few dozen more strips for the beams. I'm looking forward to the epoxy's arrival --- I have never used it before, and the black magic chemistry is appealing.
With any luck, I can have the bulkheads completed (cleats and all) and the sides ready to be scarphed by the 25th of June. I'm attending a conference in Nova Scotia from then until the 1st of July, at which time my brothers will be joining me in Ithaca for most of July. I think the extra hands for putting the hull together and doing the interior work will be a great help.
Inspiration for the day: a page detailing how Matt Layden (the designer of Paradox) went about building his new boat Enigma.
10 June 2006, Day 2
Ithaca Farmer's Market, on a nicer day (click to enlarge)
Lots of progress today, mostly of the cutting sort. The weather was abysmal in the morning, so I went to the Ithaca Farmers Market and enjoyed the morning snacking on excellent pastries and tasting blueberry wine. The afternoon weather was suddenly wonderful, and I got a lot done: bulkhead #4 cut out, bulkhead #2, transom, and all side panels layed out and cut. There seems to be a problem with the layout for the sheet with the side panel, transom, and bulkhead #2. The CD that came with the plans had an alternate layout for this panel, but I couldn't get it to work either. In the end, I moved the butt joint on bulkhead #2 to make things fit. Later I noticed that Don Elliott suggested the same thing in his Paradox construction booklet. I could have saved myself some hassle by checking there first...
The plywood and lumber arrived today, delivered for free by Baker-Miller Lumber in Groton, NY. I've been really happy with the selection and quality in the past.
I spent some time looking for a circular saw, new jigsaw blades for the thick plywood, and sawhorses (which double nicely as a kayak rack!). After collecting the tools and moving some of the plywood around, I cut out bulkhead #1 and drew bulkhead #4. Not much visible progress, but a lot of behind-the-scenes setup got done.
6 June 2006
The plans for Paradox arrived today from David Bolduc. They also came with a CD containing many nice photos, hints, material lists, and other useful things. I ordered six gallons of epoxy from Progressive Epoxy in Pittsfield, NH. They have an excellent price on their epoxies and a very informative page, though it is sometimes hard to find what you are looking for. The epoxy is due for delivery next Monday.