
How to Scan for Confidential Data: Windows
- On your desktop, double-click Identity Finder, or find the program by going to the Start menu > All Programs > Identity Finder
If this is the first time you've used Identity Finder, continue with Step 2. Otherwise, skip to step 3.
- In the New Identity Finder Profile window, enter a password, confirm the password, and then click . In the Profile Password box, click . Continue with Step 4.
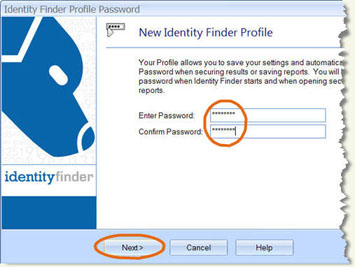
Note: Do not use your NetID password.
- If you have used Identity Finder in the past, you will be prompted to enter your password from before. In the Identity Finder Profile Sign In window, enter your password, and then click .
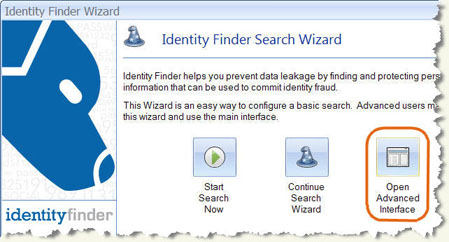
- In the Search Wizard window, click .
- If the program tells you there are updates to be run, please agree to the updates.
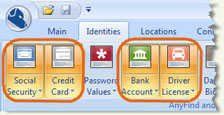
- You can choose the types of data you want to search for and the locations on your machine you want to search. Click the
tab and then click each type of confidential data you want to search for
during the scan. Data types highlighted in orange are included in the
scan. You
should search for the data types Cornell considers confidential: Social
Security numbers, Credit Card numbers, Bank Account numbers, and Drivers
License numbers.
- Click the tab.
- If you use an account that has priviledges as an "Administrator" (you can install programs, change system settings, etc), you need to scan the entire computer, My Computer.
- If you use a "Standard" user account for general use and either do not have an admin account or only use the admin account rarely, you can choose to scan only My Documents
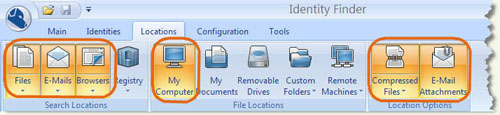
Make sure that the following are highlighted:
- Files
- E-Mails
- Browsers
- My Computer OR My Documents (read above to choose correct option)
- Compressed Files
- E-Mail Attachments
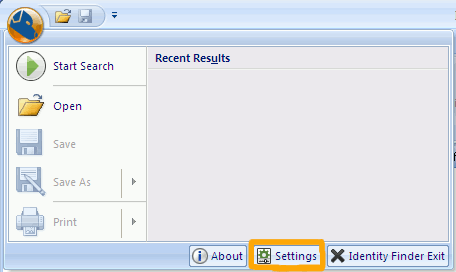
- Click the round blue button in the top-right with the Identity Finder Logo, and choose Settings.
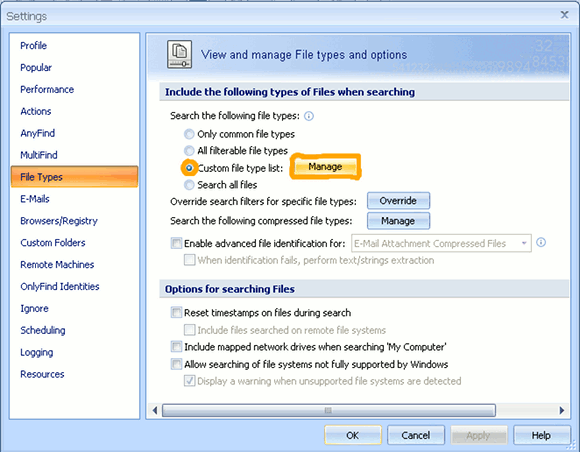
- In the panel on the right, choose File Types. Then select the third bullet down, Custom file type list, and click the Manage button.
- In the window the pops up, type .tex in the text box and click Add.
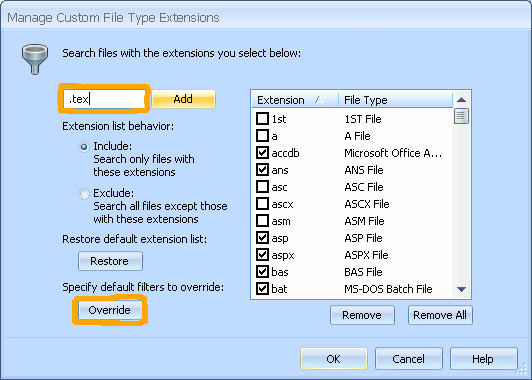
- Below where it says Specify default filters to override, click the Override button.
In the box that pops up, enter .tex (be sure to include the period) and click Add. The file extension will the appear in the list, click OK.
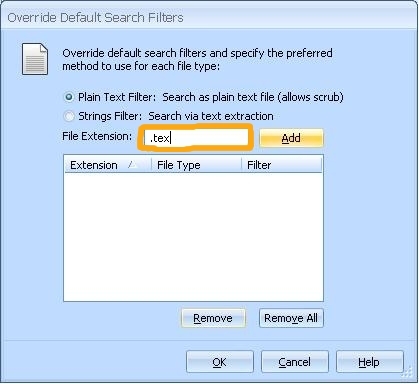
- If you currently use Eudora, or used it in the past, you must tell Identity Finder to search your mailboxes.
** Repeat Steps #11 and 12, using .mbx instead of .tex **
- One last setting (this will reduce the number of false positives found). In the Settings window, click AnyFind in the left side pane.
Scroll down to where it says "Options to automatically find Driver Licenses." and check Always require state name or abbreviation near license number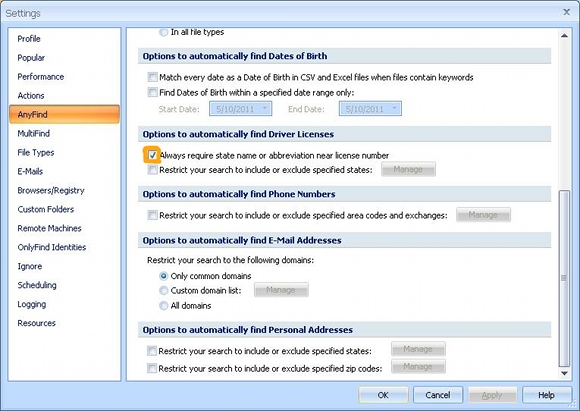
- Click OK to close the Settings window.
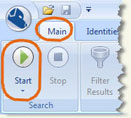
- Click the tab, and then click .
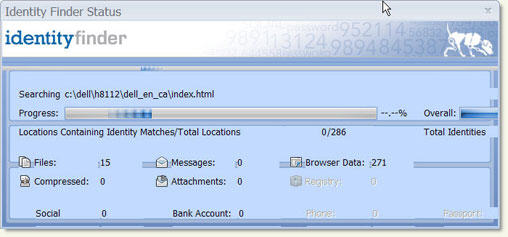
Identity Finder begins scanning. You'll see a Status window where you can track the scan progress. How long it takes will depending on the amount of data being scanned.
- When the scan is complete, Identity Finder displays a list of files
containing confidential data. Please save the results file by clicking .
Note: if Identity Finder did not find any confidential data, there will be no option to save the results.
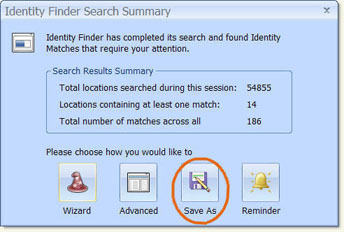
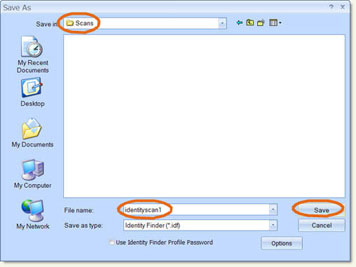
- Choose a location to save the scan results, enter a name for the file, and click .
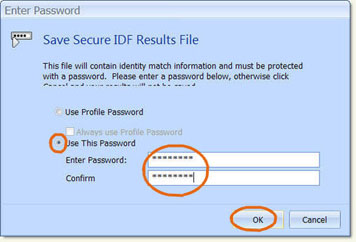
- If prompted, enter a password to use for the scan results file, confirm the password, and then click .
Note: Do not use your NetID password for the results file.
- Once your file is saved, it is time to deal with the results. If you plan on doing it later, you can close Identity Finder. If you want to handle them now, click Advanced.